
Home / Educate / School/Group Education Programs / Architecture
Some of us live in houses, others live in an apartment and some kids even live on wheels! Today, let’s pretend we’re architects and draw our own houses with elevations and floor plans.
To get started, you’ll need to download and print a blank floor plan and elevation plan, links below.
First, draw the floor plan of your house, using the blank plans you just printed and colored pencils, markers or crayons. Be sure to label each room: kitchen, living room, bathroom, your bedroom, and any other rooms you have. If you have a second (or third!) floor in your house, draw a separate floor plan for each floor. Not all rooms are perfectly square or rectangular, so draw the rooms true to their shape. It may help if you sit in the middle of each room and can see how all the walls come together. Make sure you include doorways and windows!
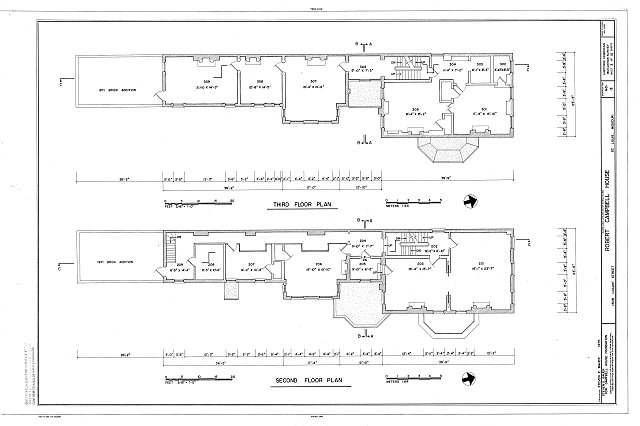
Floor plans are a map of the rooms of your house, like this:
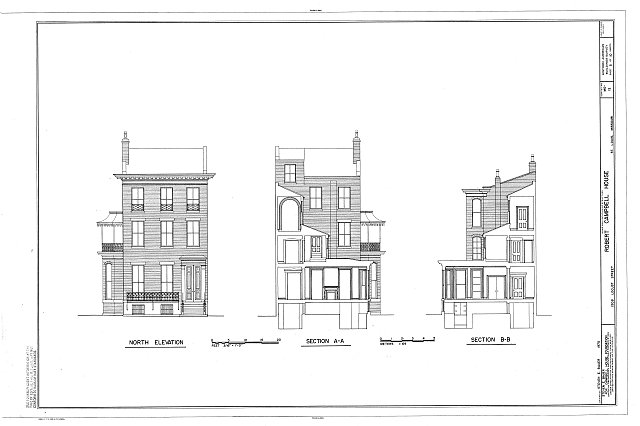
An elevation is a drawing of one side of your house, like this:
When you finish your floor plan, use the printout of the elevation plan to draw an elevation of the front of your house, complete with doors, windows, steps and any decorations that may be on the front of it. Is there a garage attached to your house? Is your house made of brick or wood or stucco? Include as many details as you can that make your house special.
After you’re done with your elevation and floor plans, have show and tell with your friends to explain the rooms of your house and what you like best about each one. When talking about the elevation, be sure to tell your classmates what makes your house unique and different from all the other houses or buildings on your street.
This program has been created with a grant from the Whitaker Foundation.
Notifications